

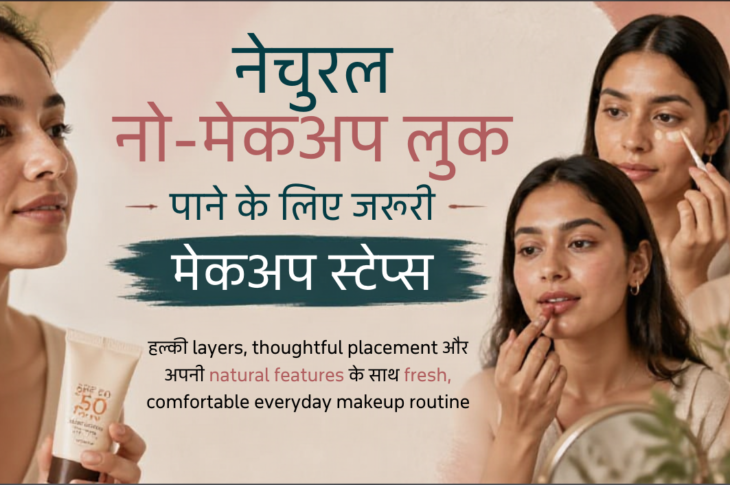
सुबह जल्दी तैयार होना है। आप चाहते हैं कि चेहरा fresh, even और awake दिखे, लेकिन ऐसा बिल्कुल न लगे कि आपने बहुत सारा makeup किया है। Heavy base, cakey foundation, obvious contour और बहुत चमकीले products से बचना है—फिर भी यह समझ नहीं आता कि natural look के लिए कौन–से steps जरूरी हैं और कौन–से छोड़े जा सकते हैं।यहीं no-makeup makeup look काम आता है। इसका मतलब makeup-free होना नहीं, बल्कि हल्की, skin-like और comfortable finish बनाना है। लक्ष्य आपकी natural features को मिटाना नहीं, उन्हें softly enhance करना है—ताकि आप खुद जैसे दिखें, बस थोड़ा more refreshed महसूस करें।
|
याद रखें: natural look किसी एक skin tone, face shape, age, gender या beauty standard का नाम नहीं है। Pores, freckles, acne marks, pigmentation, facial hair और lines सामान्य skin का हिस्सा हैं। Makeup आपकी comfort, culture, budget, occasion और personal preference के अनुसार बदल सकता है। |
No-makeup makeup look वास्तव में क्या है?
- यह invisible makeup का promise नहीं है। इसका अर्थ है lightweight, balanced और skin-like finish, जिसमें product कम हो और placement सोच–समझकर किया गया हो। हर blemish, pore या pigmentation को cover करना जरूरी नहीं है।Natural look का मतलब no effort भी नहीं है। Thin layers, सही shade, soft blending और केवल जरूरी areas पर ध्यान देना इसकी कुंजी है। Comfortable skin और confidence, perfect complexion से ज्यादा महत्वपूर्ण हैं। अगर आपको full base पसंद है तो वह भी गलत नहीं; बस उसे अपने comfort और occasion के अनुसार चुनें।कम product: पूरी skin को एक जैसा बनाने के बजाय जहां जरूरत हो, वहीं काम करें।
- Soft enhancement: brows, cheeks या lips में से एक–दो features को gently highlight करें।
- Realistic finish: skin texture को पूरी तरह छिपाने के बजाय उसे natural रहने दें।
- अपनी पसंद: कोई step uncomfortable लगे तो उसे छोड़ना बिल्कुल ठीक है।
Skin prep: natural look की सबसे जरूरी foundation
- अच्छा natural makeup साफ और comfortable skin से शुरू होता है। Skin prep को अपने skin type, मौसम और चुने हुए makeup formula के अनुसार रखें। बहुत ज्यादा skincare layers makeup को slip या pill कर सकती हैं, इसलिए simple routine अक्सर बेहतर रहता है।Gentle cleansing: चेहरा साफ करें या कम–से–कम ऐसी skin से शुरुआत करें जो comfortable और free of excess product हो।
- Moisturiser: जरूरत के अनुसार hydrating moisturiser लगाएं। Oily skin को भी hydration की जरूरत हो सकती है और dry skin को हमेशा heavy layers जरूरी नहीं।
- Sunscreen: daylight या outdoor exposure में अपनी personal skin needs के अनुसार sunscreen लगाएं। इसे makeup का विकल्प न समझें।
- Lip balm: होंठों को आराम देने के लिए balm लगाएं, खासकर अगर बाद में tinted lip product लगाना हो।
इन layers को settle होने का थोड़ा समय दें। Sensitive skin, acne, eczema, rosacea, allergies, pregnancy, breastfeeding या prescribed dermatology treatment की स्थिति में ingredients और professional advice को प्राथमिकता दें। किसी नए product को इस्तेमाल करने से पहले patch test पर विचार करें और irritation होने पर उसे रोक दें।
Lightweight base या केवल targeted concealing
- Natural look में पूरी face पर full coverage लगाना जरूरी नहीं है। आप skin tint, tinted moisturiser, lightweight foundation या केवल targeted concealer चुन सकते हैं। जिस दिन skin पहले से even लगे, no-foundation look भी काफी हो सकता है।Shade check: shade को हाथ पर नहीं, jawline और neck के पास natural light में देखें। हाथ का रंग चेहरे से अलग हो सकता है।
- Undertone समझें: warm, cool, neutral या olive undertone हो सकता है। Redness, pigmentation और surface tone अलग चीजें हैं; केवल चेहरे की लालिमा देखकर undertone तय न करें।
- Thin layers: पहले बहुत कम मात्रा लगाएं और केवल जरूरत वाले हिस्से पर coverage बढ़ाएं।
- Under-eye care: आंखों के नीचे मोटी concealer layer न लगाएं। Inner corner या किसी specific shadow area पर हल्का product पर्याप्त हो सकता है।
- Soft blending: makeup को jawline से neck की ओर softly blend करें, ताकि कोई harsh demarcation न दिखे।
Setting powder केवल shine-prone या crease-prone areas पर हल्का लगाएं। पूरे चेहरे पर powder की मोटी layer skin को flat या dry दिखा सकती है।Brows को natural कैसे रखें
Brows को पूरी तरह block या sharply redraw करने के बजाय पहले spoolie से बालों को उनकी natural direction में brush करें। खाली जगहों पर छोटे hair-like strokes लगाएं और clear या tinted gel से set करें।अपने मौजूदा brow shape का सम्मान करें। बहुत गहरा shade या एक ही मोटी लाइन natural look को कठोर बना सकती है। अगर brows पहले से full हैं, तो केवल brush और gel ही पर्याप्त हो सकते हैं।Eyes को बिना भारी makeup के define करना
आंखों को define करने के लिए कई subtle options हैं। Eyelash curler, mascara की एक हल्की coat, brown pencil या soft tightline में से केवल एक step चुनें। Black liner की thick wing या heavy smoky eye को default बनाने की जरूरत नहीं है।Inner-corner brightener या shimmer optional है। अगर आपकी आंखें sensitive हैं, contact lenses पहनते हैं या पहले irritation हुआ है, तो eye products के साथ extra caution रखें। Burning, itching या discomfort हो तो product तुरंत हटाएं।Mascara और eye products share न करें। Expired eye makeup इस्तेमाल न करें और label पर दी expiry या PAO जानकारी देखें।
|
छोटा नियम: पूरे face को define करने की कोशिश न करें। Brows, eyes, cheeks और lips में से एक या दो areas को focus बनाएं। इससे look balanced और effortless रहता है। |
Cream blush, bronzer और subtle glow का सही उपयोग
Cream blush को fingers, sponge या brush से thin layer में लगाएं। ऐसे shades चुनें जो आपके natural flush से inspired हों—लेकिन किसी एक colour को सभी के लिए universal न मानें। Blush placement के लिए rigid face-shape rules जरूरी नहीं हैं; अपनी preference और features के अनुसार उसे cheeks पर softly blend करें।Cream bronzer या contour optional है। अगर चेहरे में थोड़ी warmth चाहिए तो बहुत कम मात्रा लें और harsh lines से बचें। Contour को natural look की अनिवार्य सीढ़ी न समझें।Highlighter केवल high points पर subtle रखें। Textured skin पर excessive shimmer texture को और prominent दिखा सकता है, इसलिए soft glow या बिना highlighter वाला finish भी सुंदर विकल्प है। Budget-friendly option के तौर पर एक ही cream product को cheeks और lips पर multi-use की तरह इस्तेमाल किया जा सकता है, लेकिन उसे eye area के लिए safe है या नहीं, यह जरूर check करें।Lips के लिए “your-lips-but-better” finish
Lip balm, tinted balm, sheer lipstick या softly blurred lip liner—इनमें से जो comfortable लगे, चुनें। “Your lips but better” shade हर व्यक्ति में अलग होगा। अपने natural lip colour, undertone और रोजमर्रा की पसंद को देखकर shade चुनें।बहुत precise overlining जरूरी नहीं है। Dry या cracked lips पर irritating matte products से बचें और पहले balm से comfort बनाएं। Lip colour का उद्देश्य होंठों को किसी तय shape में बदलना नहीं, बल्कि चेहरे के overall balance को support करना है।अलग skin tones और undertones के लिए shade selection
Fair, medium, deep और हर बीच के skin tones के लिए natural look के options मौजूद हैं। सही undertone और formula न मिलने पर base ashy, grey या orange दिख सकता है। इसलिए shade को natural daylight में jawline/neck area पर test करें और कुछ समय बाद oxidation भी observe करें।Deep skin tones पर blush, bronzer और highlight छोड़ने की जरूरत नहीं है। Pigment को छोटी मात्रा में लगाकर texture और desired intensity के अनुसार build करें। Dark circles, pigmentation या redness को पूरी तरह मिटाना आवश्यक नहीं। Colour correction चाहिए तो बहुत कम मात्रा में targeted correction करें; rigid colour rules हर व्यक्ति पर एक जैसे काम नहीं करते।Dry, oily, combination, sensitive और textured skin के लिए adjustments
- Dry skin: gentle prep, thin hydrating layers और कम powder रखें। Comfort को finish से ऊपर प्राथमिकता दें।
- Oily skin: lightweight moisturiser, thin base, strategic powder और जरूरत पर blotting paper इस्तेमाल करें।
- Combination skin: अलग areas के अनुसार approach रखें—जहां dryness है वहां comfort, और जहां shine है वहां targeted setting।
- Sensitive या reactive skin: simple routine, ingredient awareness, patch test और कम नए products बेहतर हो सकते हैं।
- Textured या acne-prone skin: texture smooth करने के नाम पर heavy layering न करें। Non-comedogenic claim भी guarantee नहीं है; individual response देखें और persistent concern में dermatologist से सलाह लें।
Humid climate में thin layers और optional setting spray मददगार लग सकते हैं, जबकि cold या dry climate में moisturising और comfort पर ध्यान दें।
Product amount और blending mistakes
|
Don’t |
Do |
|
बहुत ज्यादा base और powder |
Thin layers और targeted coverage |
|
गलत undertone से grey या orange finish |
Natural light में jawline/neck पर test |
|
Brows को बहुत dark और blocky बनाना |
Hair-like strokes और spoolie |
|
हर feature को define करना |
एक या दो areas पर focus |
|
Social media filter को finish standard बनाना |
Real skin texture को स्वीकार करना |
|
Expired makeup या गंदे brushes |
नियमित hygiene routine |
|
Irritation को सहते रहना |
Product हटाना और जरूरत पर professional advice |
Office, college और everyday quick version
5-minute office/college routine: moisturiser, sunscreen, targeted concealer, brows brush या gel, cream blush या tinted balm, और चाहें तो mascara। अंत में lip balm या tint लगाएं।
10-minute polished version: ऊपर के steps के साथ lightweight base, soft brown liner, subtle blush और जरूरत वाले areas पर हल्का powder जोड़ें।
No-foundation version: skin prep, sunscreen, targeted concealer, brows, blush, curled lashes या optional mascara और tinted lip balm। यह रोजमर्रा के लिए काफी हो सकता है।
Long-day और humid-weather version
Long day के लिए भी शुरुआत thin layers से करें। Waterproof या long-wear product केवल उन areas में लगाएं जहां सच में जरूरत हो। Blotting paper, lip product और छोटा touch-up kit रखें। बार–बार heavy reapplication करने के बजाय shine को gently blot करें और केवल faded areas को touch up करें।Humid मौसम में moisturiser और base की मात्रा हल्की रखें। Setting spray optional है; इसे comfort और formula compatibility के अनुसार चुनें। Makeup को टिकाने के लिए इतना product न लगाएं कि skin भारी महसूस होने लगे।Makeup hygiene और skin comfort
Brushes और sponges को नियमित रूप से साफ करके पूरी तरह dry करें। Mascara, liquid eye products और lip products की expiry या PAO label देखें। खासकर eye और lip products share न करें।रात में makeup और sunscreen को gentle तरीके से remove करें। Harsh scrubbing और aggressive DIY remedies से बचें। Burning, swelling, rash, itching, eye pain या breathing difficulty होने पर product तुरंत हटाएं। Severe reaction या breathing difficulty में urgent local medical help लें। Prescribed treatment को खुद से बंद या बदलें नहीं।
7-day “natural look practice” plan
- यह beauty test या guaranteed transformation नहीं है। इसे flexible practice plan की तरह अपनाएं और जो steps आपकी life में सच में उपयोगी हों, केवल वही रखें।Day 1: अपने current products, shades, expiry और tools review करें।
- Day 2: skin prep और sunscreen के साथ बिना base के comfortable look आजमाएं।
- Day 3: targeted concealer और thin layers की practice करें।
- Day 4: brows और mascara/soft liner में से केवल एक eye step चुनें।
- Day 5: cream blush या tinted balm की sheer application practice करें।
- Day 6: अपनी skin tone, undertone और weather के अनुसार quick routine बनाएं।
- Day 7: daylight में look देखें, comfort और wear का review करें और केवल उपयोगी steps रखें।
आज से शुरू करने के 5 छोटे कदम
- एक simple skin-prep routine तय करें।
- पूरे face पर base लगाने के बजाय targeted coverage आजमाएं।
- Brows, blush और lips में से केवल दो focus areas चुनें।
- Natural light में एक shade test करें और undertone note करें।
- Brushes, sponge, mascara और lip products की hygiene/expiry check करें।
Mini checklist
- क्या मेरी skin comfortable और prepared है?
- क्या full base की जरूरत है या targeted concealing पर्याप्त है?
- क्या shade natural light में jawline/neck पर match हो रहा है?
- क्या base thin, blended और skin-like है?
- क्या brows soft और natural direction में हैं?
- क्या blush, eyes या lips में बहुत ज्यादा layers तो नहीं जुड़ीं?
- क्या products मेरी skin type, climate और comfort के अनुकूल हैं?
- क्या brushes और eye/lip products साफ और usable हैं?
- क्या कोई irritation, burning या swelling हो रही है?
- क्या मैं इस look में खुद जैसा और comfortable महसूस कर रहा/रही हूं?
आपकी skin, आपकी पसंद
Natural no-makeup look का सबसे जरूरी step है अपनी skin और features को मिटाने के बजाय उनके साथ काम करना। आपको poreless skin, perfect brows या full coverage की जरूरत नहीं है। सही preparation, हल्की layers, thoughtful placement, shade awareness और clean tools से simple look बनाया जा सकता है।Makeup का उद्देश्य आपको किसी standard में fit करना नहीं, बल्कि आपकी सुविधा, expression और confidence को support करना है। आज केवल दो छोटे steps से शुरू करें, mirror में खुद को बिना judgment देखें और वही routine चुनें जिसमें आप सचमुच सहज महसूस करें।
